First, we must know ‘What is MongoDB and nodeJS’. We also use Express. Express is a framework for NodeJS.
Set up
1. Install Node.js
First, ensure that you have a supported version of Node.js installed. For this project, I’ve used Node.js 14.15.4. You can check the MongoDB compatibility docs for more information on which version of Node.js is required for each version of the Node.js driver
2. Create a free shared cluster on MongoDB
The most efficient way to get started with MongoDB is to use Atlas. Create a free cluster on MongoDB.
3. Create a connection with the MongoDB database and NodeJS application
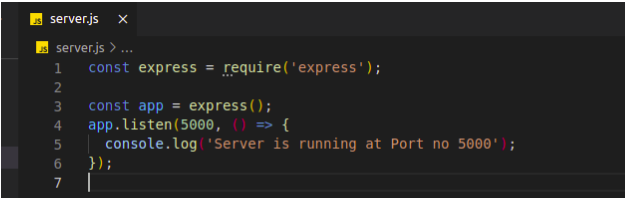
First, we need to create a server. Then we can connect with MongoDB. Let’s create a server first.
i) Create a project folder.
ii) In the Project folder create a .js file (server.js)
server.js will be our server entry point.
Install packages:
npm I express mongoose
Now it’s time to connect the MongoDB database with your application. Create a free shared cluster on MongoDB. After creating a cluster, you have to create a username and password and also make sure to remember them. While creating connections, a username and password will be needed. Add your IP address under “Add My Current IP Address.”
There are four types of connections. Actually, we use two types of bonds.
i) Connect your application – for application
ii) Connect using MongoDB Compass – for data monitoring
For application connection – copy the application URL and change some data like <username>, <password>, and DB_name. Wrap the username and password with the angle brackets that you have just created. In your case, DB_name will be empty. DB_name will be your database name.
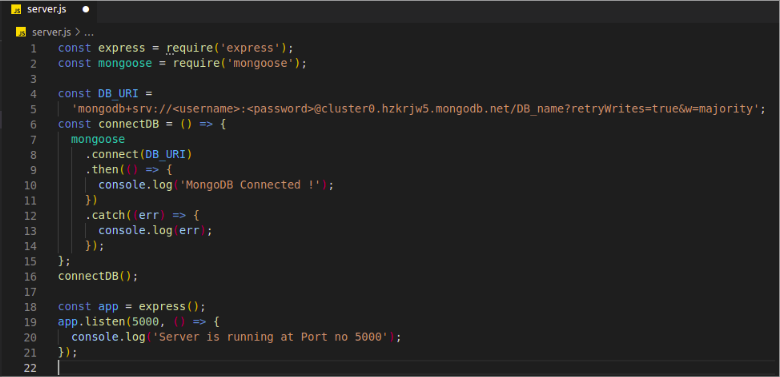
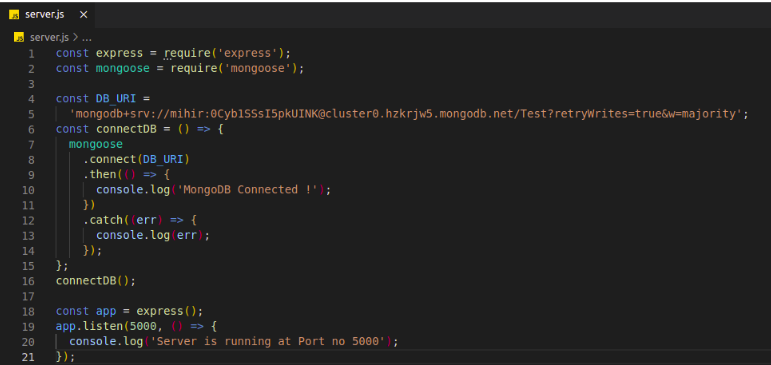
After inserting all data in the database-URL, it will look like this.
Now run your server.
node server.js
If you use the node command, then you have to re-run the server.js file every time you make a change. For that case, we use Nodemon. Nodemon is a tool that lets Node.js base applications automatically restart the Node application whenever any file changes are detected in the directory.
Installation nodemon globally:
npm install -g nodemon
Now we can run the server using nodemon
nodemon server.js
Here your database connection is done. Check the terminal, it is showing “MongoDB Connected !” if your database connection goes properly. If there is any error while connecting, then the error will be shown there.
4. Create Schema and Model
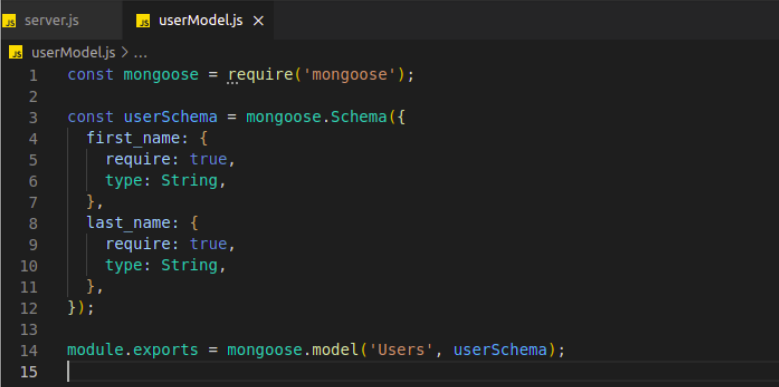
When we need to store some data on MongoDB, we have to follow the schema and using the schema, we can create a model that helps CRUD operations in the database. We are creating a simple basic model using the schema below.
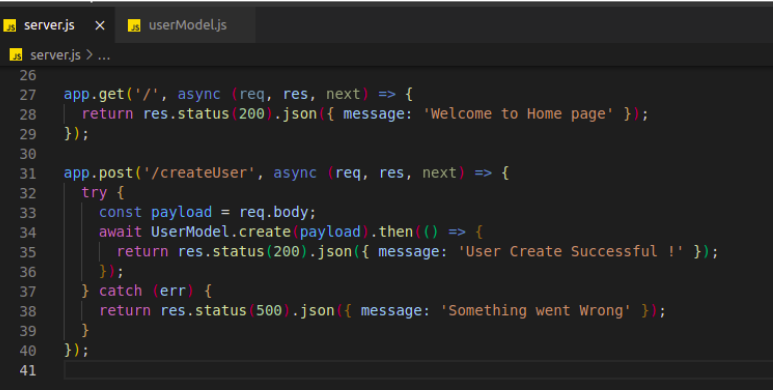
5. Create a simple API
Our app is simple so we are not maintaining (proper file structure and middleware, controller concept).
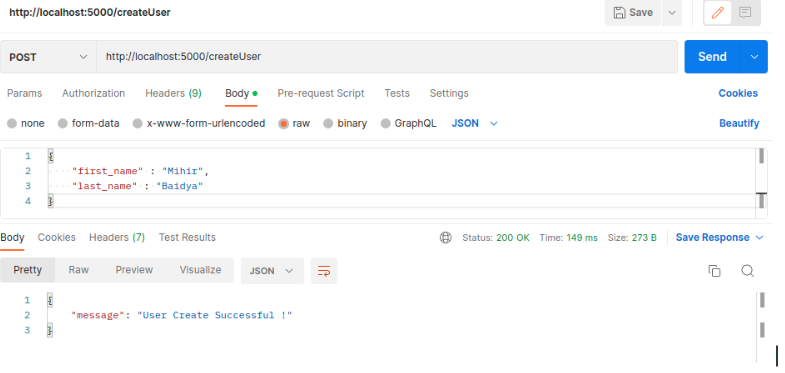
6. This is the testing time of the API
For testing purposes, We are using Postman.
7. Check data on the MongoDB database
Actually, We have created two documents

Conclusion
We all know that in web development, the front end and the back end are like two halves of a whole, neither of which would be complete without the other. So as a developer, if you are a frontend developer or backend developer, it’s important to know how to connect the backend with the front end when you don’t have a live server for the database. This is the way you can connect a MongoDB database with Node.js & store data.
Author